4. Enable models
Models are opt-in per organization: only the models an organization admin has enabled can be called through your API path. This keeps each organization's surface area explicit and auditable.
Browse the catalog
In the console, open Models (under your organization). You'll see the approved catalog grouped by capability, each model showing its provider and price per 1M tokens. Nothing is enabled yet.
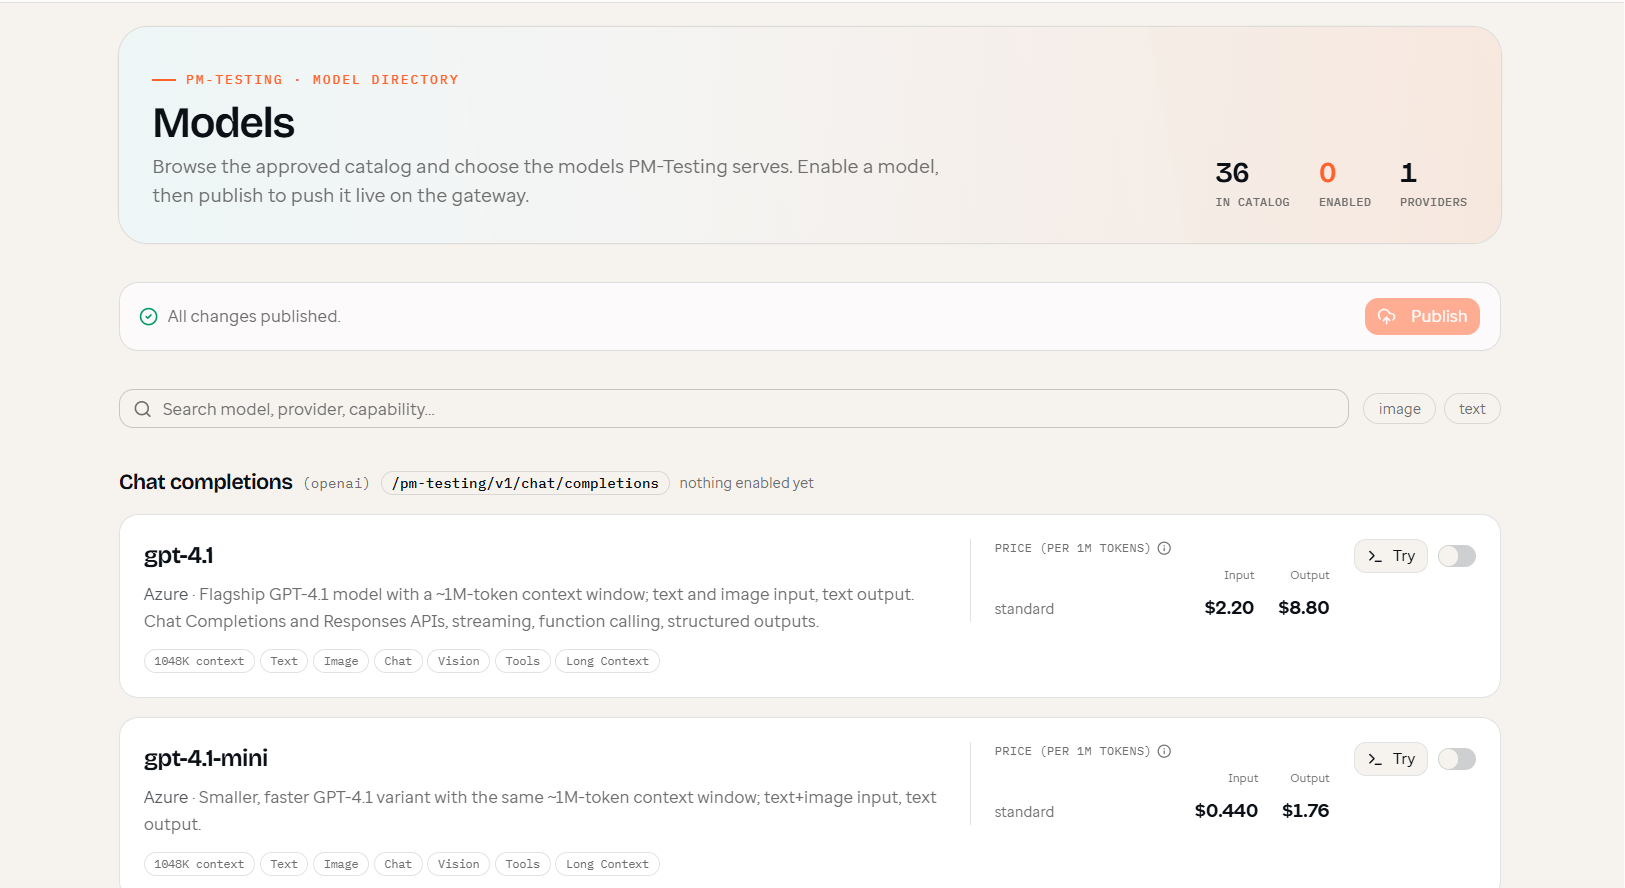
Notice the endpoint shown for the group, e.g.
/acme-health/v1/chat/completions — that's the path your apps will call for
these chat models.
Enable, then publish
- Toggle on each model you want (here,
gpt-4.1). - The banner shows unpublished changes — click Publish to push them live on the gateway.
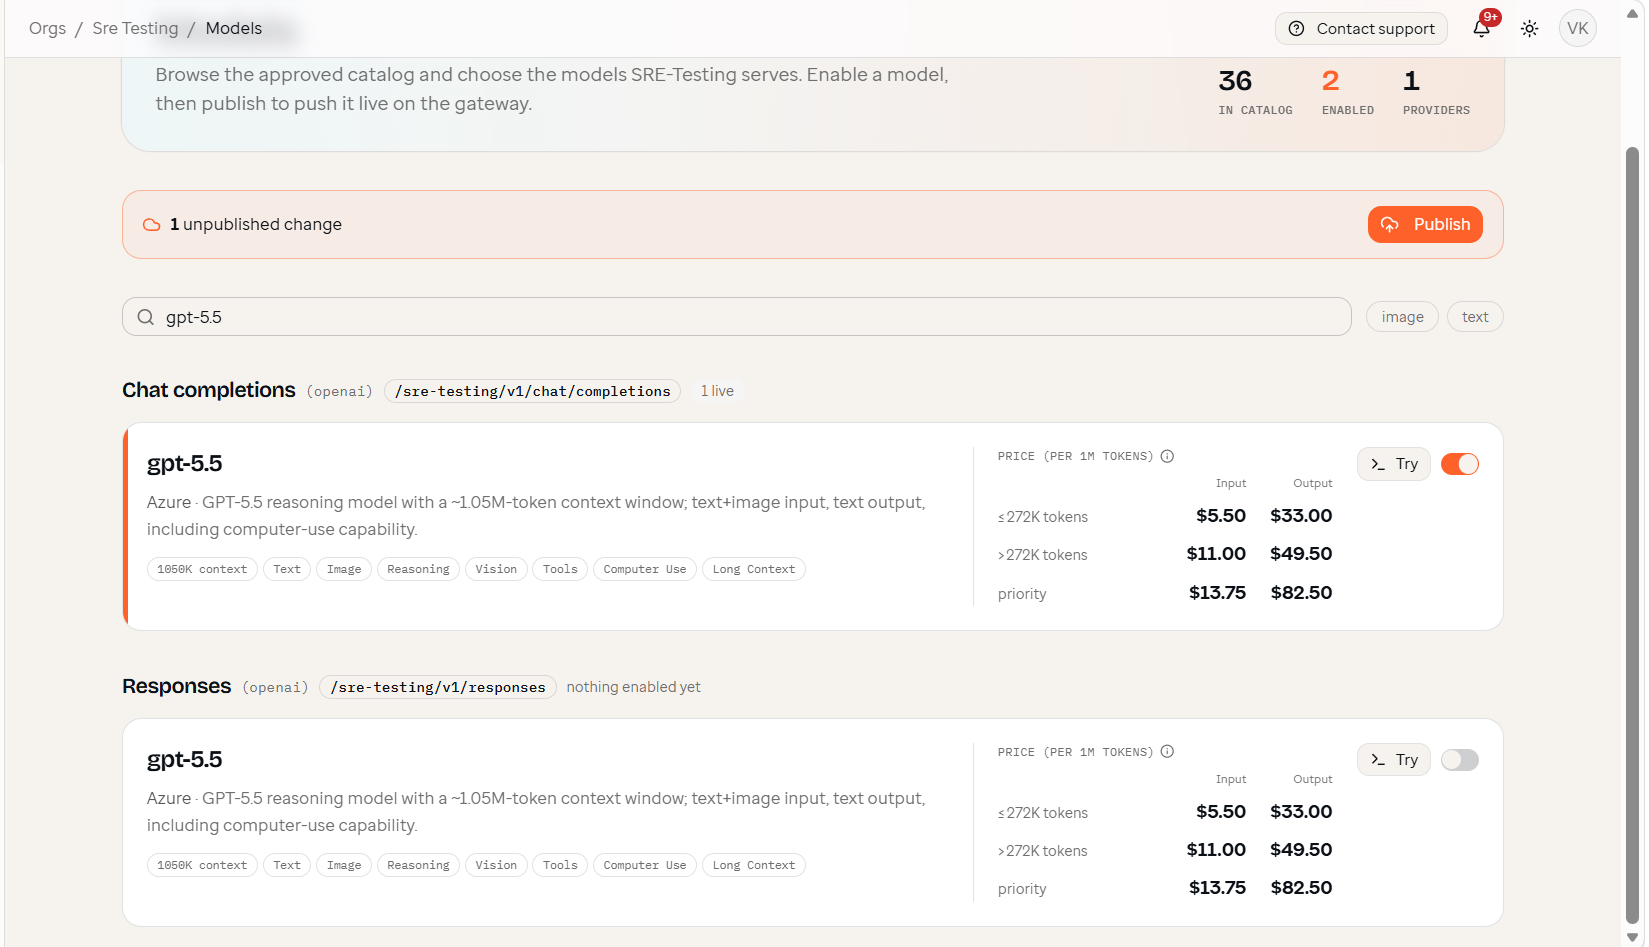
Publishing provisions your organization's route and attaches the enabled models. Until you publish, changes aren't live.
Good to know
- Only enabled models work. Calling a model that isn't enabled is rejected — see Troubleshooting.
- The
modelvalue you send in a request must match an enabled catalog model's provider-prefixed id (e.g.azure/gpt-4.1) — the prefix selects the upstream provider. Copy the exact id from the model list. - Enabling/disabling takes effect only after you Publish again.
With at least one model enabled and published, create the credentials your app will use.